> For the complete documentation index, see [llms.txt](https://docs.candy-smith.com/main/llms.txt). Markdown versions of documentation pages are available by appending `.md` to page URLs; this page is available as [Markdown](https://docs.candy-smith.com/main/general-info/how-to-reskin.md).
# How to reskin
Dynamic Reskin for Sweet Candy Sugar Match 3
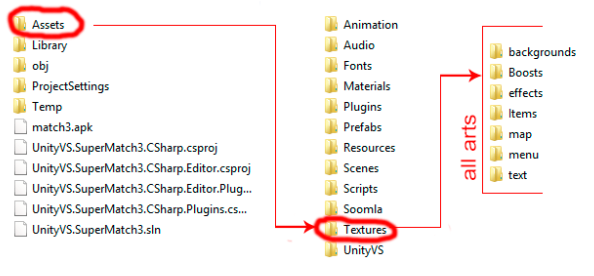
You don’t need to change a lot of similar arts in different places into the project. Just change one art in Textures\_png folder, and this art will replaced in all places of the project, where it should be located.
1. Open a project
2. Go to Assets → Textures\_png
3. For reskin, you should to change all arts in all folders into Textures\_png Folder.
EXAMPLE, open Textures \_png Folder --> Items (folder includes all items and blocks images in the project). Replace your arts in Textures\_png --> Items to reskin all images in this Folder. Do the same for all folders inside the Textures\_png.
Remember - your art should be the same size and only in the PNG format like in the project, to correctly display the textures in the project.